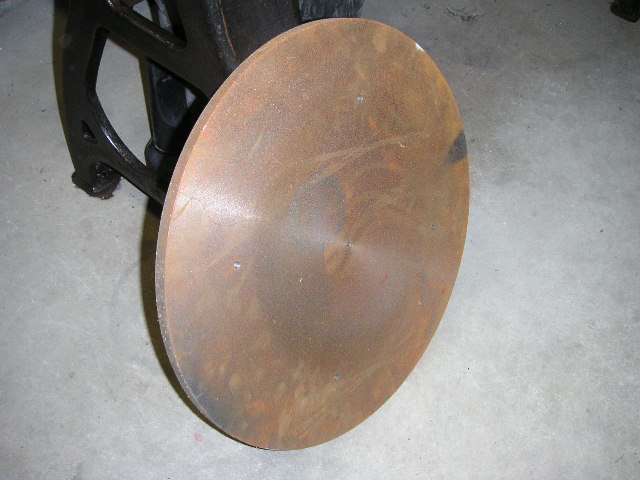
Grate as cast
For additional picture, see "The White Grate Project" in Papers
Fun With burner Grates
Steam cars don't have many moving parts. That's probably a good thing, since I spent most of the winter sorting out one non-moving item on my White.
The Problem
A couple of years ago, my original burner grate reached the point where continued patching was no longer practical. After a few false starts on how best to make a new one, (for example: laser cutting of stainless plate), we decided to use cast iron. However, the founder we consulted didn't believe that he could successfully pour a section that thin. There was some evidence that the original grate was entirely machined; taking that clue, we cast two disks about 22" in diameter and 1" thick. These were turned to a diameter of 21 1/2" and a thickness of .7" One of these was put on a rotary table in a Bridgeport, and attacked with a series of ball-end and corner-rounding mills to produce the six concentric ridges which characterize the White grate. These were then slit, (some 1600 times!), with .025" slitting saws. The turned casting weighed about 60 lbs.; the finished piece about 15 lbs. Lots of chips! Accompanying photos show the old and new grates, and the turned casting with the new grate.
Grate as cast
For additional picture, see "The White Grate Project" in Papers
When I received the grate, I was surprised that the slits weren't uniformly .025". In fact, they probably averaged a lot closer to .020". I didn't consider that a problem, however, and proceeded to drive the car extensively. Gradually, I developed a light-back problem: after a decreasingly short distance, I'd start howling and lighting back - especially when I slowed down. I chased that problem every way I knew, without success. One day, I noticed that all the paint had burned off the bottom of the burner pan. I measured its' temperature at around 600 F.- right around the ignition temperature of gasoline - my preferred fuel. Dropping the burner - very easy on the White, fortunately - I discovered that the slits were now down to about .015" or less, in many cases. There was no evidence of corrosion, and I haven't been able to develop a good metallurgical explanation of why this happened, other than some sort of "creep" which perhaps could have been avoided if I'd had the wit to anneal the casting after machining. Interesting that all the slits got smaller. I would have been less surprised if some had grown, while others had shrunk.
As a result of the narrower slits, the mixture had become very rich - verified by an inspection of the fire: lying right down on the surface of the grate, and a bit reddish, rather than the proper blue. As a result, the grate overheated. Not only did this produce, (apparently), light-backs; it also warped the grate, which was now out-of-plane by about an inch.
The Fix
I took the grate to a heat-treater who had done me some favors in the past, and asked if he could flatten it. After several months, (!), he produced a reasonably flat grate. Turned out he was waiting for other work pieces to show up which could be used to weigh down the edge of the grate.
Now I had to recut the slits. I tried several methods. Two are shown in the accompanying photos. The first involved a right-angle attachment in my milling machine. Unfortunately, the attachment is much larger in diameter than a Bridgeport unit, so I had to use a 6" saw in order to be able to get to the bottom of the slits. I immediately encountered problems with heating: as the periphery of the blade got hot, the blade distorted, looking like a potato chip! I didn't want to use liquid cooling, and so tried an air blast - shown in the photo. That worked fairly well, but I got tired of listening to the compressor. So next I tried a heat gun, bringing the whole blade up to around 200oF. That worked well, but was very time-consuming.
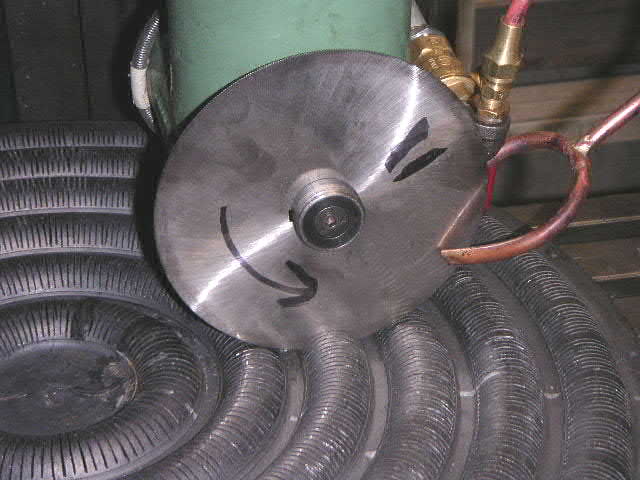
Slitting saw on milling machine
Then I hit a hard spot in the grate. Of course, I couldn't feel it, so immediately broke out a piece of the casting between the slits. After breaking several more pieces, I decided I had to address the hardness problem.
A metallurgist friend gave me a recipe of 2 hours at 1450oF, followed by 2 hours at 1250oF, followed by very slow cooling. After being turned down by several local heat treaters, (they were afraid of warpage), I found that Rhode Island Heat Treat, in Providence, was willing and able. In three days, I had a soft and flat grate back.
I concluded that I needed a better way to cut the slits, however - a way that gave me some feel for the process. After an experiment using 2" blades on a right-angle drill attachment (pictured),-promptly destroyed the attachment-, I had a brain storm.
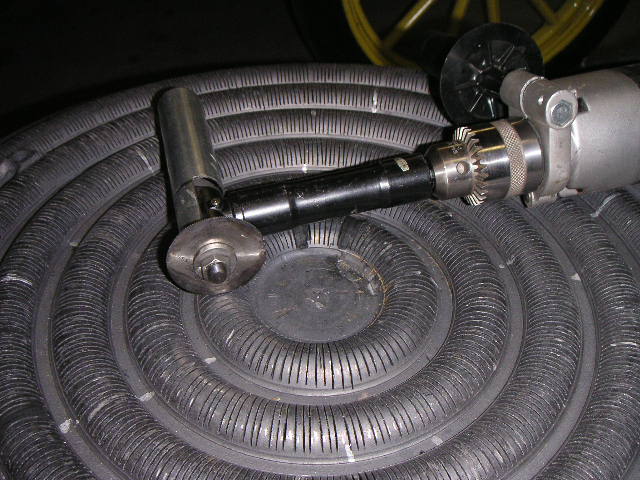
Using drill with right angle attachment
I have a Fein sander. Normally, it oscillates a triangular sanding pad through an angular displacement of about 3 degrees, at the rate of 20,000 cycles per minute. I knew that Fein made a saw attachment for this device. So I made one - capable of holding standard 2" jewelers' saws having about 24 teeth per inch. See the accompanying photo. This worked extremely well, and had the very great advantage of being easily controlled. There were still a few slightly hard areas; I found that a carbide blade dealt easily with these. And when I inevitably broke the carbide blade, I could simply rotate it a bit in its' mount, as less than a quarter of the circumference was used in the actual cutting. A good thing: a 2" carbide blade is about $100.
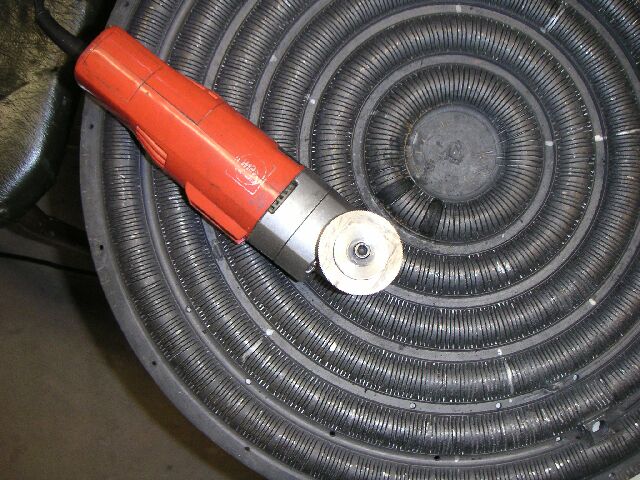
The Fein grinder
Testing
I've only driven the car once since the "Fix"; however, I was able to go about 20 miles with no lightbacks and no howling, (another symptom of a rich mixture in the White). So I'm optimistic.
Richard Wells, May 2005
Return to Papers